The Architecture of the Impossible: A Masterclass in Navigating the Geometry of Monument Valley
The Architecture of the Impossible: A Masterclass in Navigating the Geometry of Monument Valley
Monument Valley is not merely a game; it is a meditative journey through Escher-inspired dreamscapes where the laws of Euclidean geometry are secondary to the perception of the eye. To play this game is to engage in a silent dialogue with architecture, where the primary objective is to guide the silent princess, Ida, through a series of "Sacred Geometries" to seek forgiveness. However, deep mastery of this world requires more than just casual tapping. It demands a fundamental rewiring of how you perceive spatial relationships. This guide focuses on the "How-To" of optical manipulation, teaching you how to deconstruct visual paradoxes, synchronize mechanical shifts with character movement, and exploit the "Point of View" (POV) logic that governs this universe.
How to Transcend 3D Logic: Embracing the Rule of Perspective
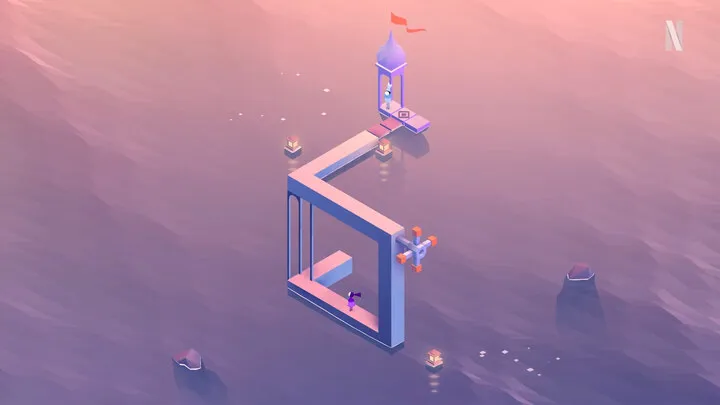
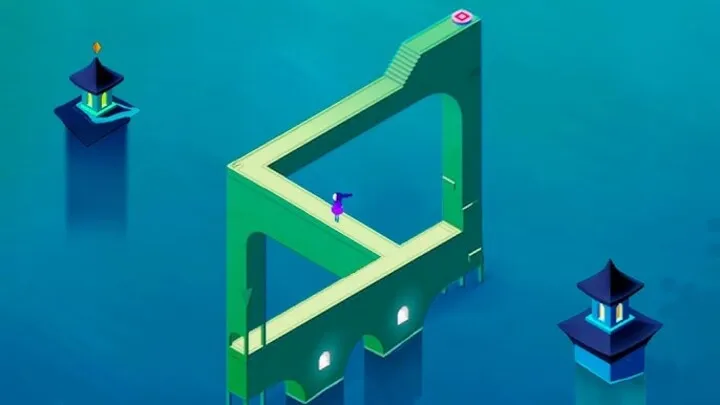
The first step in mastering Monument Valley is unlearning everything you know about three-dimensional physics. In this game, if two paths look like they touch, they do touch. This is the "Perspective Bridge" mechanic. To execute this, you must stop looking at the structures as physical objects and start looking at them as 2D isometric drawings. When you rotate a crank or slide a block, you are not moving stone; you are re-aligning lines on a canvas.
To successfully navigate the early "Water Palace" levels, you must learn how to "Flatten" the depth of the screen. For example, if Ida is on a platform in the foreground and a staircase is in the distant background, rotating the central pillar until the staircase appears to align with her platform creates a viable path. Your fingers must become the architects of the impossible, snapping reality into place based on visual alignment rather than physical proximity.
Steps to Align a Perspective Bridge
- Locate the Pivot: Identify which parts of the structure are rotatable (usually marked by circular studs).
- Ignore the Gap: Look past the physical space between the two platforms.
- Match the Lines: Rotate until the top edge of the current platform forms a continuous line with the target path.
- Commit the Movement: Move Ida across the junction while the perspective is held; moving the camera mid-walk will often break the bridge.
How to Manipulate the "Crank and Slide" Mechanisms for Fluid Transit
Once you understand perspective, you must master the mechanical interaction with the environment. The "Crank" (the circular wheel with four handles) and the "Slide" (the blocks with three raised dots) are your primary tools. The "How-To" of these tools involves more than just turning them; it involves "Kinetic Synchronization." You often need to move Ida onto a moving platform and then manipulate that platform while she is standing on it to reach higher elevations.
Advanced navigation requires "Mid-Motion Interaction." You will encounter scenarios where a platform only stays in a specific position as long as your finger is holding it. To master this, you must learn to "Lead" Ida with a tap on the destination and, while she is walking, quickly adjust the slides or cranks to catch her before she reaches a dead end. This requires a rhythmic understanding of her walking speed versus the rotation speed of the architecture.
How to Utilize Crow People as Path-Clearing Assets
The Crow People are often seen as obstacles, but deep-level play involves treating them as "Mobile Keycards." Crows walk on fixed paths and squawk to block Ida's progress. To bypass them, you don't just wait; you manipulate the environment to change their walking loop. By rotating a platform while a Crow is on it, you can "Ship" the Crow to a different floor or a dead-end balcony, effectively clearing the path for Ida.
In levels like "The Box," you must learn the "Crow-Swap" technique. This involves timing your movements so that as a Crow steps onto a rotatable tile, you spin it $180^{\circ}$. This not only moves the Crow away from you but often places the Crow on a pressure switch that opens a door for Ida. Mastering the Crows is about understanding that their behavior is 100% predictable; they are simply biological gears in the clockwork of the level.
Crow Manipulation Tactics
- Isolation: Move a slider to trap a Crow in a small loop.
- Redirection: Rotate a junction just as the Crow reaches the center to send them down a non-intersecting path.
- Utility: Use the Crow’s weight to trigger floor plates that Ida cannot reach.
How to Master the Verticality of the "Totem" Companion
The Totem (the four-blocked yellow pillar) is your most versatile tool in the mid-game. To use the Totem effectively, you must stop viewing it as a character and start viewing it as an extension of the architecture. The Totem can be used as a bridge, an elevator, or a shield against Crow squawks. The "How-To" of Totem mastery involves "Stacking and Bridging." You can place Ida on top of the Totem to reach high ledges, or slide the Totem into a gap to complete a walkway.
A crucial technique is "Remote Activation." Sometimes Ida needs to stand on a button while the Totem moves to a different part of the map to trigger a second button. You must learn to coordinate these two entities. If you find Ida stuck, ask yourself: "Can the Totem stand where I cannot?" Often, the Totem is the only thing that can survive "Crushers" or "Void Gaps," making it your primary scout for dangerous terrain.
How to Navigate "The Box": Internal and External Logic
The level "The Box" introduces a unique challenge: the world is contained within a cube that unfolds. To solve this, you must master "State Persistence." When you close one side of the box and open another, the position of Ida remains constant relative to the internal geometry. How you transition between the "Inner" and "Outer" states determines your progress.
To solve the puzzle of the four lights, you must learn to rotate the box while looking for "Hidden Latches." These are small visual cues, like a slight discoloration on a hinge, that indicate a side can be interacted with. The "How-To" here is a lesson in patience—you must systematically test every face of the cube, remembering that the solution to the "North" face is often hidden on the "South" face.
The Box Unfolding Checklist
- Light Sync: Ensure Ida is standing on the pressure plate before closing the lid.
- Gravity Flip: Check if rotating the box while a side is closed will reposition Ida onto a different wall.
- The Secret Drawer: Look for slides on the base of the box that reveal hidden stairs.
How to Exploit the "Water Flow" and Reflection Paradoxes
In the "Water Palace" and "The Descent," water does not flow downward; it flows according to the "Visible Path." If a waterfall appears to land on a horizontal surface, it creates a new walkway. Mastering this involves "Fluid Geometry." You can use cranks to change the direction of water pipes, which in turn fills pools that raise floating platforms.
The reflection mechanic is even more complex. In levels with mirrors or still water, the reflection is not just a visual effect; it often shows a "True Path" that is invisible in the physical world. To navigate these, you must look at the bottom half of the screen (the reflection) to see where the walkways actually connect. If you see a path in the reflection that doesn't exist above, move Ida to that spot—she will appear to walk on thin air in the physical world, but her reflection will be on solid ground.
How to Manage the "Inversion" of Gravity in the Vaults
Later levels introduce "Gravity Walkways"—paths that allow Ida to walk on walls or ceilings. The "How-To" for these sections involves "Transition Points." These are usually curved tiles that bridge the floor and the wall. You cannot jump to a wall; you must find the specific "Fillet" tile that allows Ida to transition her gravity.
When Ida is on a wall, your perspective shifts again. "Down" is now relative to Ida’s feet. To master this, you may physically rotate your phone or tablet. This helps you visualize the new "Floor." You must be careful when rotating the environment while Ida is on a wall; if the perspective shift removes the "Transition Tile" from her path, she will become stranded on a vertical surface with no way back to the horizontal plane.
Gravity Inversion Rules
- The Curve Rule: Only curved corners allow for a $90^{\circ}$ gravity shift.
- The Sightline Rule: If Ida is on the ceiling, a slider on the floor may still affect her path if it is "visually" adjacent.
- The Exit Rule: Always identify your return path to the "Standard Floor" before exploring a ceiling route.
How to Solve the "Hidden Geometry" of the Forgotten Shores
The Forgotten Shores expansion introduces "Twisting Architecture." Unlike the standard rotation, these structures can be twisted like a corkscrew. The "How-To" for these levels is "Structural Deformation." When you twist a pillar, you are changing the elevation of the path at different intervals.
To master the "Oubliette," you must learn to twist the central column so that the stairs align with Ida’s current level, then walk her halfway up, and twist it again to align the upper half of the stairs with the exit. This "Two-Step Twist" is a vital skill. It requires you to stop thinking of a staircase as a single unit and start thinking of it as a set of modular blocks that can be rearranged mid-climb.
How to Interpret Minimalist Sound Cues for Timing

Sound in Monument Valley is not just atmospheric; it is a "Tactical Guide." Every movement of the architecture produces a musical note. When you are rotating a piece into the correct position, the pitch will often resolve into a harmonious chord. This is how the game tells you that you have found the "Golden Alignment."
If you are struggling with a complex mechanical puzzle, listen to the "Feedback Loop." A discordant note usually means the path is blocked or the alignment is slightly off. How to use this? Close your eyes for a moment and move the slider slowly; when the chime sounds "pure," you have likely unlocked the next walkway. This auditory "How-To" is especially helpful in the dark levels of Ida’s Dream, where visual cues are intentionally obscured.
How to Conduct the Final Ascension: Synthesizing All Techniques
The final levels of the game require a synthesis of perspective, gravity, and companion manipulation. To complete the "Grand Finale," you must use the Totem to trigger gravity-flip switches, which allow Ida to walk on a ceiling that then becomes a floor through a perspective shift. The "How-To" of the endgame is "Multi-Layered Planning."
You must think three steps ahead. "If I move the Totem here, will it block the sightline I need to create the next bridge?" The endgame is a test of your ability to hold the entire map’s logic in your head at once. You are no longer just solving one puzzle; you are conducting an orchestra of stone and light. Success is achieved when you can visualize the "Hidden Path" through the chaos of shifting pillars and squawking Crows.
Final Mastery Summary
- Visualize the 2D: Treat the screen as a drawing, not a space.
- Trust the Totem: It is your most powerful mechanical asset.
- Listen to the Chimes: Let the music confirm your geometry.
- Embrace the Paradox: If it looks right, it is right.
In conclusion, Monument Valley is a masterpiece of design that challenges the player to look beyond the surface. Mastering the game is not about speed or reflexes; it is about the "How-To" of perception. By learning to manipulate perspective bridges, synchronize with moving platforms, and harmonize with the musical architecture, you transform from a casual player into a master of the impossible. Each level is a lesson in how our eyes can deceive us and how, through a simple shift in point of view, the impossible can become the path forward. As Ida returns the Sacred Geometry, the player too returns to the world with a sharpened sense of space, balance, and the beauty of the paradox.